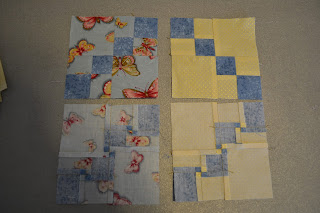
Again, I went to Ebay to find my fabric for this project and this is what I came up with :
Step 1: Assemble smallest blocks first, which are done with strips.
And, They measure perfect! I slowed WAY down and wanted to get these right. I pressed carefully.

The fun part was fanning the seams. I've never made such small blocks before. They came out excellent!
Step 2: Making Blocks A & B:
Starting with adding the "squares" to these smallest blocks. I had to read the instructions several times before I understood what was happening. This was a very unique way of adding squares! It's for sure a faster way, but I can also see how much more precision we gain by doing it this way. Take a look!
Yes, I sewed my little blocks to more strips! Now, had my little blocks been off just a little bit, I would have LOVED how I could have "fixed" my mistakes by using the precise lines of the strips to be sure to make my blocks were square. But, my blocks were already square and measured just fine! The only thing I had to watch out for here was to be sure to keep them close enough so that I didn't run out of strip.
After sewing, Then, I cut between them to separate them, then used my ruler which was 2 1/2" and cut both sides to trim up to exact measurements. Going sideways allowed me do this without problems. When I tried to go up and down, I wasn't ambidextrous enough! I figured if I moved the ruler, then I wouldn't necessarily have them exactly measured. It worked just fine!
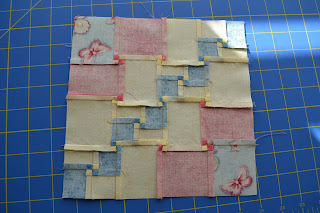
Here Blocks A & B are together and fanned. Somehow after all the perfect measurements, I'm no longer perfect? Pressing stretch, maybe? I did have a hard time figuring out how to press individual squares rather than pressing along a whole seam line. I found myself constantly turning my iron back and forth, or flipping the squares, because every other square's seam goes in the other direction.
Next is to make 32 Four Patches. These are larger. And, they measure fine after pressing.
Still fanning all the seams!
2 finished squares on the board.
And, TA DA, the finished top!
The strip on the right side is showing border fabric, although I forgot to lay in the darker blue for the inner border. I just wanted to get an idea of what it will look like when borders are attached. I really like how it turned out. It's pretty, and I liked working with the fabrics this time!
I am still not sure how come my squares ended up a bit on the small side, especially my tiny 4 patches. I know those measured perfect at the beginning. I ended up adjusting my "1/4" seam rather than seam ripping :( I know, I know... sssssshhh. I just couldn't fathom ripping seams of all those fanned intersections, pressing them flat again to try assembling them again.
I haven't decided if now I want to do the Asian Nights larger version of this to practice my pressing such small patches or not. I'm not happy with the precision, even though everything measured perfect after sewing individuals. I'm fairly certain it is the pressing of the blocks to get seams to fan that is my failure.
Anyway, this project took 2 weeks. I didn't get that much time put in on it due to LIFE, but progress is all good.
Happy Days!


Dawn it looks great!!!! I love your fabrics!!
ReplyDeleteI know what you mean about everything being perfect and then the next step "not perfect" mine looked the same way, just off a bit.
I think you did a fantastic job on this quilt!!
I'll be watching to see if you do Asian Nights or not. Interestingly I had more problems with it than with Town Square, probably the large amount of time in between the two LOL
keep up the great work.
Vicki
Good Job! I hope Harriet & Carrie are reading and see what you are doing. I Like the fabric combination. The top looks great.
ReplyDeleteThanks Ladies!
ReplyDeleteI've decided to keep moving along rather than dwell here :) So, on to the next class! I'm positive my problem is in the pressing rather than the sewing, because all measurements work.
I seriously doubt either of the Hargraves will pop in here. They are busy and I'll be content to be able to call the shop if I get stuck:) They promised that ANY of the people working there could straighten us out with just knowing a page number. I'm hoping I don't have that problem again.
Onward and Forward to More Fun Stuff!