Friday, November 13, 2015

Emotional Losses


In Memory of my fur baby  4/26/05-11/11/15


Zoe

Autumn is my favorite time of year for outdoor activities.  The cool weather, sunshine with clouds, changing colors, and clear and open space away from summer crowds is just sweet.   

I didn't fully comprehend how much I enjoy the season, until I realized that the quilting room was so far back in my mind I haven't been there in 2 months!  I don't do well in our summer heat, so I spent much of the summer quilting in my cozy cooler room.

When Fall came around, the dogs and I hit the trails, and we've been walking 4-8 miles/ day.  I'm thankful that Zoe made it through our walking season. This picture was taken on her last day. This picture doesn't look like her to me, but it probably reflects how she felt.  She has been my best dog. She was loyal and typical Aussie, smart and trainable. She doesnt have a grey hair on her, and it was a surprise to see a tumor grow so fast. If she didn't get cancer, I think she would have had many more years to share with us. 

Yesterday I opened the door to the quilting room.  I'm not sure I'm ready to come back and get rolling, but I have gifts I need to make for the holidays so I am going to work on it. Then, I'll be taking another break through the holidays, as we  travel back home.  This is the first year we don't have a school vacation schedule to adhere to, so we will hopefully be able to spend more time with family and friends :)

Rest in peace my furry companion. 


Friday, September 11, 2015

Improvements and Other Things

I'm supposed to be working on Class 240.  Good thing while everyone else in this season is having to go back to school, I am not tied to a schedule. :)  And, for the first time ever, I do not have children going off to school this year!  Life is changing.  Seasons are changing.

First, the weather has turned delightful.  Perfect for taking nice rides with hubby on my newer motorcycle. I used to have this one a couple years ago. It was a '91 Honda Nighthawk 250. Previously used as a motorcycle safety class bike with only 2,000 miles on it.  But I soon found that it just didn't go fast enough, or take corners smooth enough ;)


So, I sold it at the end of the season that same year, with the understanding that I was going to hunt down an Adventure 650 bike.  Well... hubby decided I didn't need to spend that much money. lol.  So, it took me 2 years to find this gem on Craigslist at the beginning of this summer! I talked hubby into going with me to take a look.  One look and he said, "what is your hesitation??"


She is a 2012 Kawaski Versys 650, with less than 4,000 miles.  And, yes, she is plenty fast and corners great.  Hubby decided it was so nice that maybe he wanted a bike too!  So, we found a Vstrom 650 deal.  Now, we spend weekends when they are cool enough exploring the back roads and byways.  Last week we took an Experienced motorcycle safety class, STAR.  Lots of fun :)  She is a bit dirty in this pic, as we took a ride along the mountain fireroads. 

And, of course, I still have to stick in our bicycle rides too. So, there has not been that much time for quilting!  oh my!

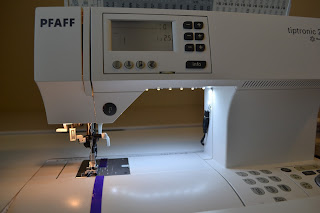
Class 240 starts with improving workspace.  I think I got that covered with my new George!  lol.
But, I noticed right away while experimenting with him, that I needed MORE light in that corner of the room, outside my sewing room. 

I purchased these from Amazon.   I was able to cut and use one for both machines!


Need more light?  These are wonderful LED's that light up the entire space underneath, and now I don't need to worry about where to put the lamp!

And, I've been practicing a little bit on George.  He is all set up now, and ready to quilt.
These are my first two attempts to see what the tension does, and try my hand at free motion. This is with thread already in bobbin, and the freebie sample thread that came with the box. It is nice Superior variegated thread.
 Then, I swapped out for the brown thread, and a fil-tec prewound bobbin (also samples since I don't have any thread yet for this machine) and this is what I got!  Not so nice anymore. The only real change here was the bobbin! Looking at following picture, you can see the back side where the thread was being pulled all the way to the back.
 So, I played with it until I got it as best as I could considering I'm working with brown on top and white on bottom with totally white fabric.  I chose that combo just so I could really work the tension to learn it.

I decided I really like the idea of Fil-Tec's bobbin and the thread is nice, with no lint and very affordable.  So, I ordered some and am awaiting this bonus package.

So, most of the rest of class 240 was reading about sashing and how to add triangles to diagonal set sashed quilts, cornerstones, frames...  

Lesson 6 is project Cabin in the Cotton. It is a log cabin pattern on diagonal with simple sashing. 
The picture uses 1930 reproduction fabrics and suggests a baby quilt.  My absolute favorite fabrics are the feedsack reproduction fabrics and I have been collecting them, hoping to gain the skills to make something nice with them.  So, I just couldn't bear to use any of my current stash yet. lol.

However, I did find some on ebay that were already cut in jelly roll strips of 10 different fabrics!
This will work perfect :)
I will get to work with my favorite fabric on a trial run! and maybe add to my stash a bit left over??

Anyway, I've been busy, just not moving fast on any one thing. Wish I was further along with using George, but at least cooler weather is on the way, and then it will be winter!

Thursday, August 20, 2015

Jump Up and Down and Clap!!

Yes, Welcome please....my new machine... GEORGE!
Of course, it is fate.  I had JUST ordered my hand quilting kit because I had resolved that George wasn't going to come this way within my budget.

Two DAYS later APQS listed their "Used Machine Sale" on their web site and George was there at the bottom and right at MY wishful price!!!  I have been watching their web site for 6 months! Never has there been a George at this price.

In fact, they listed the machines on a Thursday afternoon.  I had checked that morning and still nothing listed and then that evening there was a whole list!  Of course, I could NOT get to sleep for the excitement.  When I woke hubby by my tossing I told him he needed to wake me at 7:30am so I could be the first caller in the AM ..Iowa time! But, there was no need because I just could not sleep at all.  And, I WAS the first caller :)

George was manufactured in 2008 and was traded in for the newer model.  Not sure why, the only difference is the color and the foot shaft. For $200 I had them upgrade the foot shaft so I could use interchangeable feet.  No Biggie.  And, the color is... immaterial. LOLOL  Old Silver vs. New White.
But, it took them 2.5 weeks to refurbish the machine and then they shipped by lightening fast ABF. So, here we are 3 weeks later! And, look at my arrival!


I had to wait for family to come home and help move boxes upstairs.  Hubby and I put together the table last night.

I found a good use for my old cutting table!  I figure if I put these two tables together, and in this corner my quilt will not have a problem falling off!  This is just outside my sewing room.  Yes, I have finally spilled out into the rest of the house!  Someday, when the kids leave, I intend to take over this whole bonus room which is over the garage.

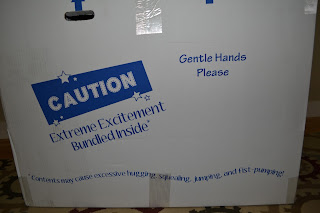
Next is THE box.

Enlarge the picture and read the fun print on the box.  SO TRUE!  LOL

I just couldn't wait to unload it, so I did this myself. Look what was inside!

Can you tell??? I'm SO excited!  And, isn't it so nice he came with a bow tie?

There is lots to learn,  In fact, a whole flash drive was sent along with George.  Boxes of stuff needs to be put together. But, I just can't wait to try him out!  I put together some sandwiches while waiting, so I will be ready to practice.

Speaking of practice... This is my finished practice piece .. learning to hand quilt!

and the close up.  It isn't perfect, and I know that. But, I think that it passes as a first try!  And, I liked it.  I will have to have multiple projects going so I can have something to hand quilt and machine quilt!  I wonder what I do with this?

Patience pays off.  I am one happy camper.
Now, back to setting up a new quilting space!

Thursday, August 13, 2015

Hot Summer Days

Triple Digit weather here.  But.... at least we don't have humidity!   LOL.

It has been good weather for getting indoor stuff accomplished.  I've rearranged my sewing room!
Class 240 starts with Lesson 1 going back to the sewing room and upgrading things.  While I don't need to consider my power usage or seat cushions, I have decided that there is a better way to arrange.  

This was the old arrangement


However, these are the things I have been thinking of :

  1. My larger piecing continued to hang off the end of my tables and I wanted more light on my left side of the machine. 
  2. My cutting table is unable to move without having a second person due to the blocks it sits on. This makes it hard to move near my design board, and take pictures without table end in picture. And, my table is not hard, it is soft with a crack down the center for folding. 
The new set up!  So logical, but I finally got that Ah, Ha  moment!  


The tables were swapped and now I have my window to my left, and a wall on both sides to catch the quilt fabric as it goes through.  I am loving my QTools seam lines for accuracy. 


Next, I addressed my table issues.  CraigsList to the rescue!  I found an old "adjustable height" wood and laminate table for $20.  First, I had husband buy PVC pipe, electrical conduit grade which is thicker and stronger which we slide over the legs.


Then, we screwed right into the legs to tighten the plastic so it wouldn't wobble. Screws don't go through legs, just tight against them.


Then, comes the disks to set the legs into since I have wood floors, and want to be able to slide the table around.

And, here is my finished product!  Perfect height, hard with no dips or softness, and it can slide around!
 
 I did have to move my ironing board to the angle, which makes getting to my rulers on the wall a bit harder, but it was the only way to give me room for my chair.


Other things I've been working on: Hand Quilting.
Here I finally got my 6 stitches to the inch and decided it was time to start the practice project.

And, now I have got a few lines done.  I decided to use the green thread because it is still practice, and I want to easily see my stitches to improve them. I found I just couldn't see the other matching thread well enough to get a sense of what I was doing.  I am really enjoying this, but I am glad I have not counted the hours it has taken to get this far!  It is getting easier though!

And, the audiobook that has kept me company this week.. from the Chronicles of Narnia series. Usually, I've read the Lion, Witch and Wardrobe first.  I decided this time I would listen in the "other" order :)

And, I have very special exciting news coming!  

Monday, August 10, 2015

Project Re-Do

Last time I presented my finished project as this:
it was pretty, but something was off with the border.  Through wonderful feedback in the comments, I agreed it was the oversight of the yellowy green colors introduced in the border.

So, back to the fabric store I went, and found that the purple was still available and I found a wonderful new teal for the border.
Here is the newly finished quilt:
Much better :)
Thanks everyone!

Now on to class 240

Friday, August 7, 2015

I need YOUR Help!

Class 230: Project 2 Metro Main Street

I spent hours picking fabrics for this project. This is what I came up with
 The focus fabric I used was the flowers on the far right.  I planned on that as the border and then picked all the others based on this.

This is after last week, I had all the individual 9 patches and rail fences done.
 And, this is when I put them all in order! I was REALLY liking this color scheme and pattern. I was thinking.. this will be really pretty!!!
 This week, I focused on the setting triangles and then sewing the rows together

Then, I got up this morning with the anticipation of putting on the finishing touches... FINISH IT UP FRIDAY:  the borders!
Border 1

Border 2
Finished!
But, what happened?  The fabrics looked good together on my table. And, all the interior fabrics are good matches to the border print.  But, there is SOMETHING WRONG??? It doesn't sit with me right.  Technically, all my squares are good and I didn't have any trouble matching up anything or getting side setting triangles placed right.  This is an art thing with colors...

This is where I NEED your comments.  People can be brutally honest online and today I am giving you permission to tell me what you honestly think.
My son said there is too much green in the border and no greens in the interior.  But, *I* saw teals and purple in the border.

What do you think??  Please?? I need to learn from my mistakes and if I can't figure out what the mistake was I will be in trouble! It needs a name or description, not just a niggle in my head :)

I also finished the last book in the Hunger Game series; Mockingjay while I was finishing up this quilt. (audiobook)

It ended up a little depressing!  So, luckily I had good music to fall back on as I finished up my borders!

Friday, July 31, 2015

"Quilt As Desired" is NOT learner friendly

I remember that line used at the end of Quilter's Academy Freshman Yr.  I had just finished my 11th pieced project and now what?? This series is aimed at making quilters, not just top piecers. However, the book really does leave you at the end without the quilting instruction!  She refers you to another book she wrote, "Heirloom Quilting".  I have that book. Actually I have 2 of them. The older edition, and the latest edition.  I really wanted to like this method.  It took me a year to move forward just with the samples she suggests as the first step.
Beginners..... start EARLY to figure out the quilting process!  Don't wait until you are finished with all your projects! There are a lot of precursor things to learn and practice before you start on your quilt tops.

My weakness in creativity definitely holds me back when it comes to this process.  How do you know what to do? What will look good if you have no prior experience? Seeing something on one quilt does not transfer over to any quilt because they are not exactly the same.  What if I don't like the quilting suggestions at the back of the QA book? And, there is more than one way to do this and I think there are so many personal choices and preferences in the mechanics that it is hard to say there is one way, which this one book gives.

For instance, she recommends rolling the large quilt into a log and fitting it under the arm of the Domestic Sewing Machine (DSM).  Leah Day would say that is ridiculous. Yes, you can use a DSM, but how do you move a log around? Logs are stiff. Of course, I can't get anything to move around under my Pfaff because there is a plastic lever that sticks out into that space for raising and lowering my presser foot, . A log absolutely doesn't fit and I'm afraid that if I try the "squish and push" method it will break off.  And, 5" does not give me enough room to move anything anyway.  So , my DSM for quilting is not even on my list of possibilities. Harriet also didn't like the Quilt Tac method of basting, which I personally really like and have better results with than pins.  I tried it both ways in my "Quilt Samples" blog post.

So, I ended up at the local quilt studio and renting the long arm machines.  Woo Hoo, I finished all the Year One projects!

But, I felt like I was cheating my process of learning and now I feel like I'm ready to understand more of the quilting. The rental of a long arm machine isn't the direction I want to go. There is nothing wrong with using a DSM if yours works.  There is nothing wrong with a long arm machine on a frame, especially if it is yours at home!  They are options, but not mine. I don't have the room or budget for the long arm.

My realistic options are
1. Hand Quilting
2. A simple non computerized, non stitch regulated Mid Arm sit down machine

I hope to incorporate both, but until I someday obtain a mid arm machine I am pursuing the hand quilting.

For both methods I need to learn to baste and mark quilts!
Because I've been using the long arm, I've not been doing either!
Basting wasn't necessary because I roll the top and bottom on rollers.
Marking hasn't been necessary because I've been using pantographs that I trace with a laser light.

Yeah, it felt like total cheating. I was getting away with not having to do any of the "fun stuff". LOL
Truthfully, I'll never be a good quilter if I can't figure out how to do more than pantographs on a long arm.
So, I'm working this out as a newbie :)  I know, right??  I've got a whole year of quilt making under my belt ( 11 quilt projects), and I feel like I'm starting over!

Basting:
How can I do this without using the floor? Or going to the LQS and borrowing their tables, (which I have noted they do not have set up high or together anyway)?  The long arm has been a great way to be sure it is nice and straight.  I want to be sure I keep the top and backing straight.  And, after my Google searching, I found this method by Sharon Schamber that I think will be easy enough, and can be done on my dining room table with my basting gun or needle and thread and will give me the accuracy I'm looking for.  Hubby has already bought me the two pieces of trim board (3"x75") needed at Lowe's which were very inexpensive and easy to get. I may even try the thread method rather than my gun since it doesn't seem too difficult. I am anxious to try this out on my next quilt because I think it suits me. Simple :)

Quilt marking:
By simply going to Amazon and searching quilt marking it comes up with all kinds of tools.  But when checking the reviews: What someone says is great and comes off easy, another says ruined the quilt they spent hours and hours on to give as a gift.  Oh My. Who to believe? The one that got lucky? or the one that found out the hard way under certain conditions this isn't great?

I'd like to know how to alter patterns for sizes. I don't want a whole bunch of stencils. I have a light box that I can use to trace :)
How do you pick the right pattern? How much do you need to fill the space?
Can I use bigger stitches rather than tiny 12/inch?
Will a lot of quilting make a card board quilt?  I've not really been impressed with the very dense trend of quilting.

I started shopping for books that would give me the ability to have references at my fingertips. The internet is a terrific resource, but sometimes a book suits me, especially after reading Amazon reviews so I know what I am getting :)  All of the following were available as used books and cost between $2-$4! (plus shipping).

Descriptions from Amazon:


Mastering Quilt Marking covers the entire process in detail, including finding a design for the quilt top, choosing the right marking tools, obtaining stencils, marking the top, and matching borders and corners. 

This book arrived this week, and yes, it has options and choices to make! It looks like a great book to use for all my questions and reference. I will have to spend some time reading this one!


This creative 512-page illustrated resource delivers just the right pattern for their next quilting project. 1000 GREAT QUILTING DESIGNS contains templates, stencils, and step-by-step instructions -for hand or machine stitching-making it easy to create unique quilting patterns.
This is a reference book for me, not a reading book :)
It arrived in the mail just as described, a perfectly clean library edition. But, it is typical size of a Reader's Digest, small and chunky.  It will be interesting when I go to enlarge these designs on my printer. But, it IS FULL of very interesting and useful choices in quilting designs.


The ENCYCLOPEDIA OF DESIGNS FOR QUILTING by Phyllis D. Miller is the first comprehensive reference of traditional quilting designs. Quiltmakers, quilt documentors, and historians/researchers will find this book a valuable tool. Phyllis documented 375 traditional quilting designs from texts and quilt collections. For quiltmakers, the front section of the book is a how-to guide with over 500 illustrations for drawing and transferring traditional designs onto quilt tops. Some of the diagrams are: straight lines, geometrics and triangles; squares and circles; diagonals and diamonds; ovals, crescents, and curves; ropes and cables; hearts and feathers; and representational, naturalistic, designs taken from a quilt pattern, and combination designs. In the back section, the Numerical Index has numbers assigned 
to the designs for easy documentation and reference.

I ordered this book, and it has not yet arrived.  


Elsie M. Campbell's quilts have won first-place and best-of-show ribbons at many prestigious quilt shows. She teaches hand quilting across the U.S. and is a former editor of QuiltWorks Today and Miniature Quilts magazines.

So, the description didn't tell me much. But, it is all about hand stitching and the customer reviews are fantastic.  I'm still awaiting arrival of this one too. It is coming in paperback, no ebook format.


 This book I bought years ago, so I went back to it hoping for info on Hand Quilting.  I was really disappointed to find that again, the book was dedicated to learning to quilt a.k.a. piece by hand and only a small amount of info on the quilting part. Beautiful pictures. 


Thursday, July 30, 2015

Taking the Plunge-- into Hand Quilting

Yes, you heard that right.  I'm investing myself into learning to quilt by hand!  Does that seem old fashioned to you?  It appeals to my sense of simplicity and using my down time to "do" something. I hate to sit for very long as I always feel there is something that could be getting done!  LOL.

I joined a Facebook page called Celebrating Hand Quilting. There are over 10,000 members!  And daily they are showing off their beautiful hand work.  I'm inspired.  And, just recently there was a gal that posted a wonderful lap quilt and said it took her 3 weeks!  THAT kind of info is helpful and inspiring to me :)  It shows me that these smaller projects we are doing in Quilter's Academy can be done in a reasonable time, as long as I figure out what I'm doing! I'm not about to ask her how long she has been quilting to be able to do that!  But, she DID say that it was for a CUSTOMER, so she obviously can get quilts in and out. A machine is not the only way :)

Google is my friend because it turns up all kinds of results when searching "hand quilting".  I like research and got lots of stuff to sift through.  I was looking for that "thing" that speaks to me, that I can identify with.  There are all kinds of "methods" of hand quilting.  Most prick their fingers, some use spoons that dull the needle quicker, or set up frames that don't fit in my family room where hubby and I sit together. There are lots of choices out there, but I was able to eliminate many just by knowing what I didn't want.

There were two that seemed like good fitting possibilities
1. Aunt Becky's Finger Protector method - The only thing I found about this method was the You Tube video.  And the protector is special order from a special quilt place, not readily available at my LQS or Amazon.  I really liked the speed and no finger pain of this method!

2. The Thimble Lady's method-  I found this method also on YouTube, however she has a High Definition version of the video on her web site which is better to view.  She has a whole learning kit and a DVD that shows step by step the process to accomplish her no pain speedy method of obtaining up to 12 stitches per the inch!  She provides the thimble, thread, needles, frame and learning info in her kit.


I do not know that I want 12 stitches to the inch, but it's nice to know she thinks I can learn that!
I ordered the package and anxiously awaited the parcel to arrive, as if it was Christmas! She is Australian and sent it out the same day I ordered, and it took just over a week to arrive.
It arrived earlier this week and I set about putting together the lap frame which is designed to take the weight of the quilt off of your back and put it on the support of the chair. You place your legs over the bottom T. The top turns 360 degrees.

The pieces really needed ironing, so I ironed the backing and the edges of the top. I did not iron over the printed stencil because it disappears with heat! I quickly basted the pre-printed top, polyester batting and backing that was in the package and started with the first lesson... How to put the quilt in the frame. She likes it LOOSE. It allows you to fold the quilt onto the needle. This is part of what really had me interested. I attempted hand quilting my first quilt and just couldn't manipulate my needle in the tightly stretched frame.

So, after watching the first several chapters of the DVD, and reading the first lesson I started practicing.  4 stitches to the inch, and not even in spacing or stitches. The back does not mirror the front!  This is after about 2 hrs of practicing. I have already ditched the thread she includes.  It is a wonderful thread, easy to thread needle and doesn't curl and is smoooooth.  However, it was yellowy beige and I had a hard time seeing it against this yellow fabric and I really am just practicing so I wanted to easily see the length and spacing of my stitches. I need some bees wax to coat this green thread that isn't nearly as nice. It's simply something I had bought long ago when I thought I was going to be hand quilting that first quilt.


 I came back to it again the next day and practiced about an hour before I finally got this result :

Now I'm still 4 stitches to the inch, but they are more even in length and space. The back looks similar to the front.  So, I'm going in the right direction.  My goal this week is to get 6 stitches to the inch that look good.

In the mean time, I'm still working on Project 2 in my sewing room.  :)
Just finished these two audio books while doing the first 2 projects!


And, I'm still watching like a hawk for a used APQS George.  Afterall, I would love to make charity quilts and FMQ those on a machine just seems more functional.

Wednesday, July 22, 2015

Nine Patch On Point Quilted

Vol 2: Project 1 is completed, lesson 230

I had a really hard time deciding what to do about the quilting of this project.  The more I looked at it, the more I wanted to quilt a motif in the middle of those big teal squares that are not pieced. And, those triangles just begged for something that fit too.  But, I know my limitations, and standing at the long arm at the rental studio for long hours just wasn't in my "can do" category. I have a limit of 2 hrs before I feel the affects on my injured back.

I went to the studio, and looked through all the pantographs, and finally found a pattern I thought I could like, "Bellflower".  They look like tulips connected with leaves. And, they have such wonderful colors of thread there too.  So, I decided to go for it, again.

But... I have ordered The Thimble Lady's learning package for hand quilting.  I have been attempting to learn to crochet because I wanted something to do in the evenings while sitting with hubby.  Well, if I can hand quilt fast enough to keep up with my piecing, there is no reason why not.  That way, I can have the special designs that I want even if I can't have George or HQ Sweet Sixteen, both sit down mid arm quilting machines.

I finished in 2 hrs, but after I got home and squared my corners and straightened the edges, I realized I had run out of bobbin thread on a row, and didn't notice it when I restarted later in the pattern!
So, back I went the next morning, with sore back and all from the day before. This time, I asked if I could use the pantograph and chalk in the design, and then use George to free motion quilt it.  (hehe, another opportunity to get my hands-on experience :)

It took me almost an hour to do the one short space of the row, but I was doing pretty well!  There is no stitch regulator, and at first I was pressing the foot pedal too fast, and stitches were too small.  I quickly learned to go VERY slow, and I LOVE the bigger stitches that are possible with George.  I know I can adjust the stitch length a little on the long arm, but they never look the same as this!
It is another reason that hand quilting appeals to me. And, I found out that I can rent George just as I rent the long arms!  So, maybe I will just stick with George over there!  Of course, the hard part is that it is just a small table, and it is hard to bring my stuff and make it "home". lol I did bring clamps along this time, so that I could clamp down the edge of the quilt to the table edge on the back so it wouldn't fall off the table and pull on the needle and fight with me.  Colleen there at the shop thought that was pretty creative!  :)  You can probably find my row. It has some green chalk which makes it stand out a bit.  I will need to wash the quilt in order to get rid of the remains of the chalk, as it didn't all rub off. Wish me luck on that!

I am anxiously awaiting my learning book, DVD and thimble from the Thimble lady so I can start practicing!  I'm really hoping this works out well.  Because between hand quilting and renting George, I may just have a system to rely on :)